-How to create a Metallic apple with the apple company logo on its tongue
(i apologize for the tutorial being a little different; i could no access all of the same pictures as the ones that i used above)
Step 1: copy a picture of a metallic ball that you found on the web, then go into adobe design and press ctrl+n enter, and Photoshop will be smart enough to size it for you so use the default, and then ctrl+v to paste the picture.

Step 2: find an image of an apple and copy it, the ctrl+v onto the metallic ball so it looks like this

Step 3: however, you will need to have the apple below the metallic ball layer, so click on your apple layer, and drag it underneath the background like this


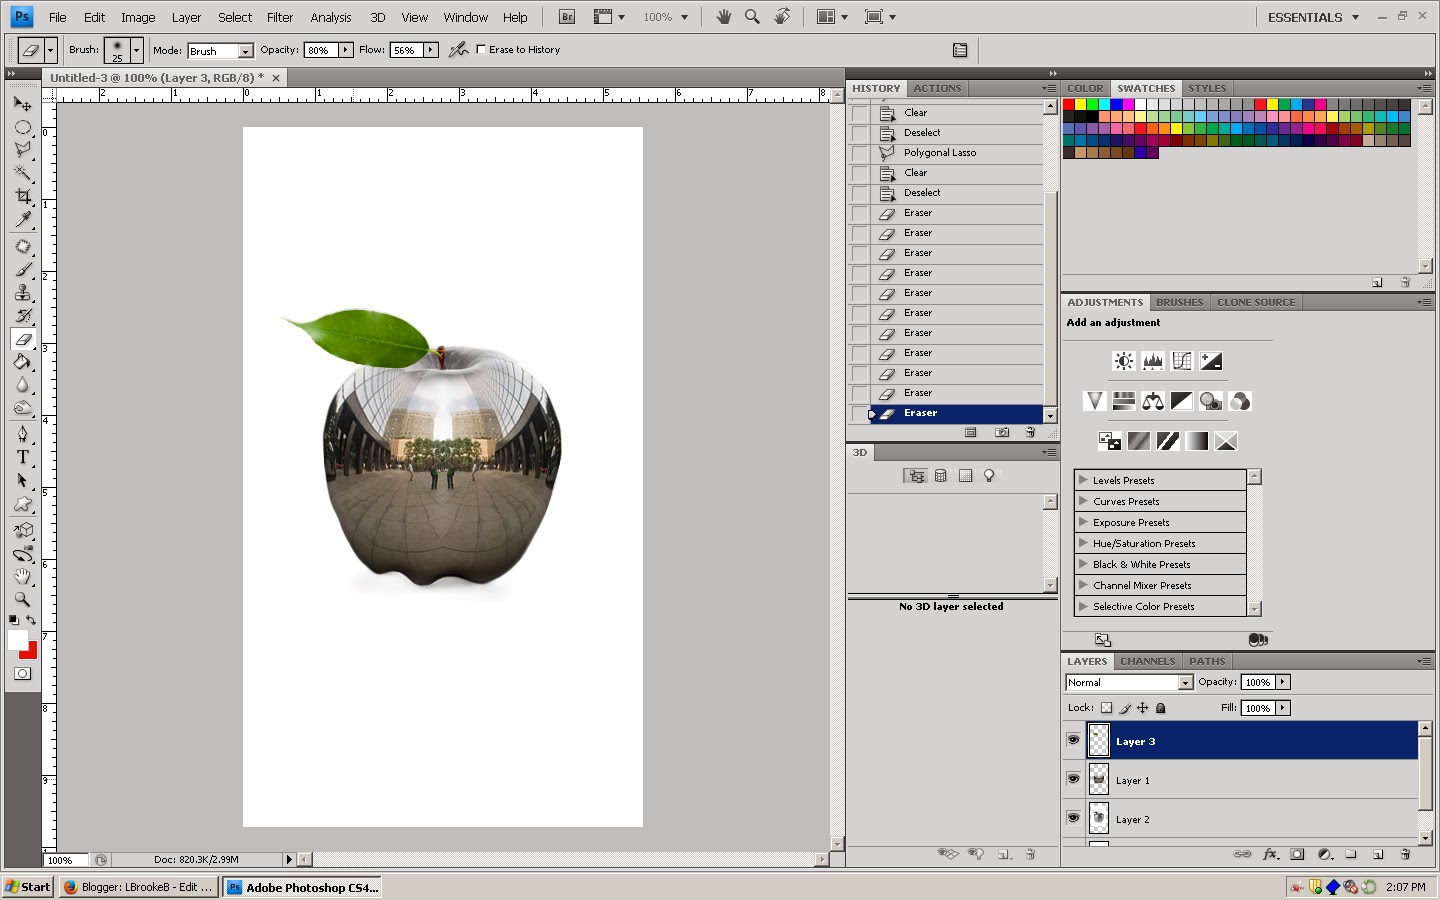
Step 4: Now turn the opacity down to about 55% on the metallic ball layer, so that you can see the apple underneath, and use ctrl+T to size the metallic ball until its a pretty good fit


Step 6: now we are back onto the apple layer, with the metallic ball layer turned off so you can see the apple. Now we want to do ctrl+shift+U to desaturate the apple, so that it will match the color of the metallic ball.


Step 7: but if you want your leaf and stem to be green, you will have to go back to your original red apple picture you copied, copy it again, and paste it on top, using the polygonal loop tool to cut out everything but the leaf and the stem (have the new apple that you pasted set to a low opacity so that you can line the leaves up)
Step 8: now flatten the images together so that you can move onto the next part. go to layer-flatten image and it will combine all of your layers together

Step 9: now find a picture of a mouth with a tongue, copy it, the ctrl+T paste it onto the apple (make sure the mouth has a long enough tongue that you can to your next steps).

Now go online again and find a picture with of the technology company Apple logo, and copy and paste it to your picture. You need to move that layer however, underneath the tongue, and turn the tongue layers opacity down to about 45.

Step 10: now ctrl+T to position the apple, but you want to left click, and scroll down to flip vertical, so you will be apple to make the apple fit well

now repeat step 5 using the filter-liquify to mold the tongue around the apple logo (this is on the tongue layer)

Step 11: no we are on to the easy parts- pick a background for your apple copy it, the do ctrl+N to make a new page, about 700x700, paste, and do ctrl+T to make the bench really large so that when you put the apple on it, it will seen as if its sitting on it.(first you must do layer, flatten image to drag whole thing) Next do windows-arrange-float all in windows and then click onto your apple layer, then drag it onto the bench project.

now you will want to consolidate them to tabs again so you can work on your bench

Step 12: cut out the white from the apple layer with the polygonal lasso tool so that it will look like this

13: finally, you can simply find a picture of an apple with a bite taken out of it, copy and paste it ctrl+V and move it around and size it ctrl+T until you have it how you would like it. Good Job!

-Brooke Bramante