Thursday, January 9, 2014

Final Project

                                                              (Preview of final results)  

                       -How to create a Metallic apple with the apple company logo on its tongue
                                      (i apologize for the tutorial being a little different; i could no access all of the same   pictures as the ones that i used above)

Step 1: copy a picture of a metallic ball that you found on the web, then go into adobe design and press ctrl+n enter, and Photoshop will be smart enough to size it for you so use the default, and then ctrl+v to paste the picture.


Step 2: find an image of an apple and copy it, the ctrl+v onto the metallic ball so it looks like this


Step 3: however, you will need to have the apple below the metallic ball layer, so click on your apple layer, and drag it underneath the background like this


so now you are working on your metallic ball layer, but you need to cut it out. Simply click on the polygonal loop tool, and cut out your picture till the only thing left is the ball and the apple underneath

Step 4: Now turn the opacity down to about 55% on the metallic ball layer, so that you can see the apple underneath, and use ctrl+T to size the metallic ball until its a pretty good fit

Step 5: Then you go to Filter-Liquify-forward warp tool- and push around the metallic ball until it fights against the apple well *note- don't worry about the leaf or the stem, just worry about sizing to the apple


Step 6: now we are back onto the apple layer, with the metallic ball layer turned off so you can see the apple. Now we want to do ctrl+shift+U to desaturate the apple, so that it will match the color of the metallic ball.
Now go back to the metallic ball layer(opacity is turned back up), turn it on, click eraser with an opacity of 40 or 35, and gently erase the area by the stem and the leaf

Step 7: but if you want your leaf and stem to be green, you will have to go back to your original red apple picture you copied, copy it again, and paste it on top, using the polygonal loop tool to cut out everything but the leaf and the stem (have the new apple that you pasted set to a low opacity so that you can line the leaves up)
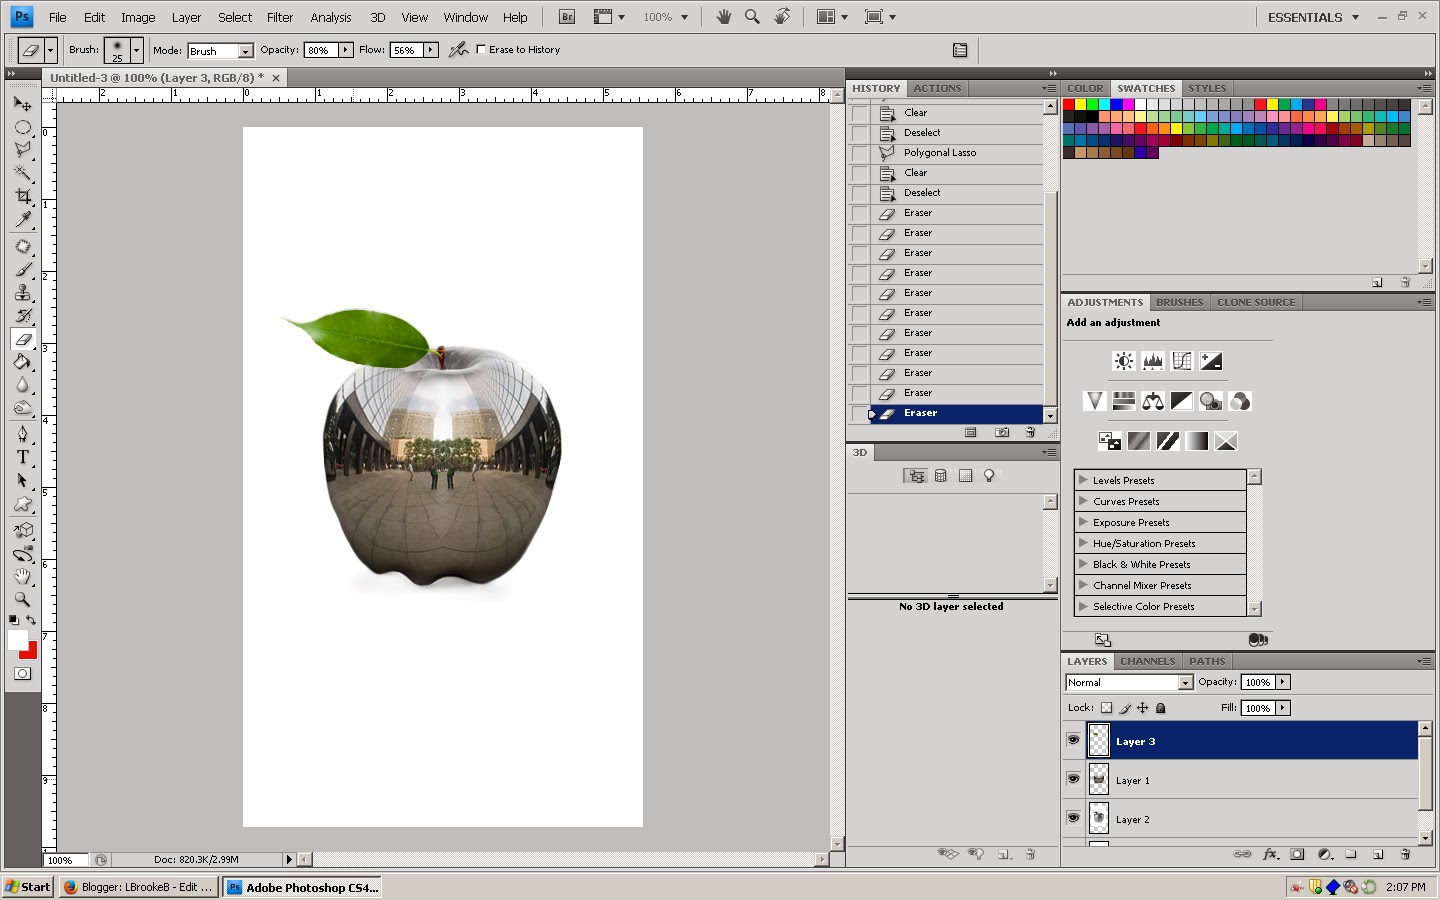
Step 8: now flatten the images together so that you can move onto the next part. go to layer-flatten image and it will combine all of your layers together
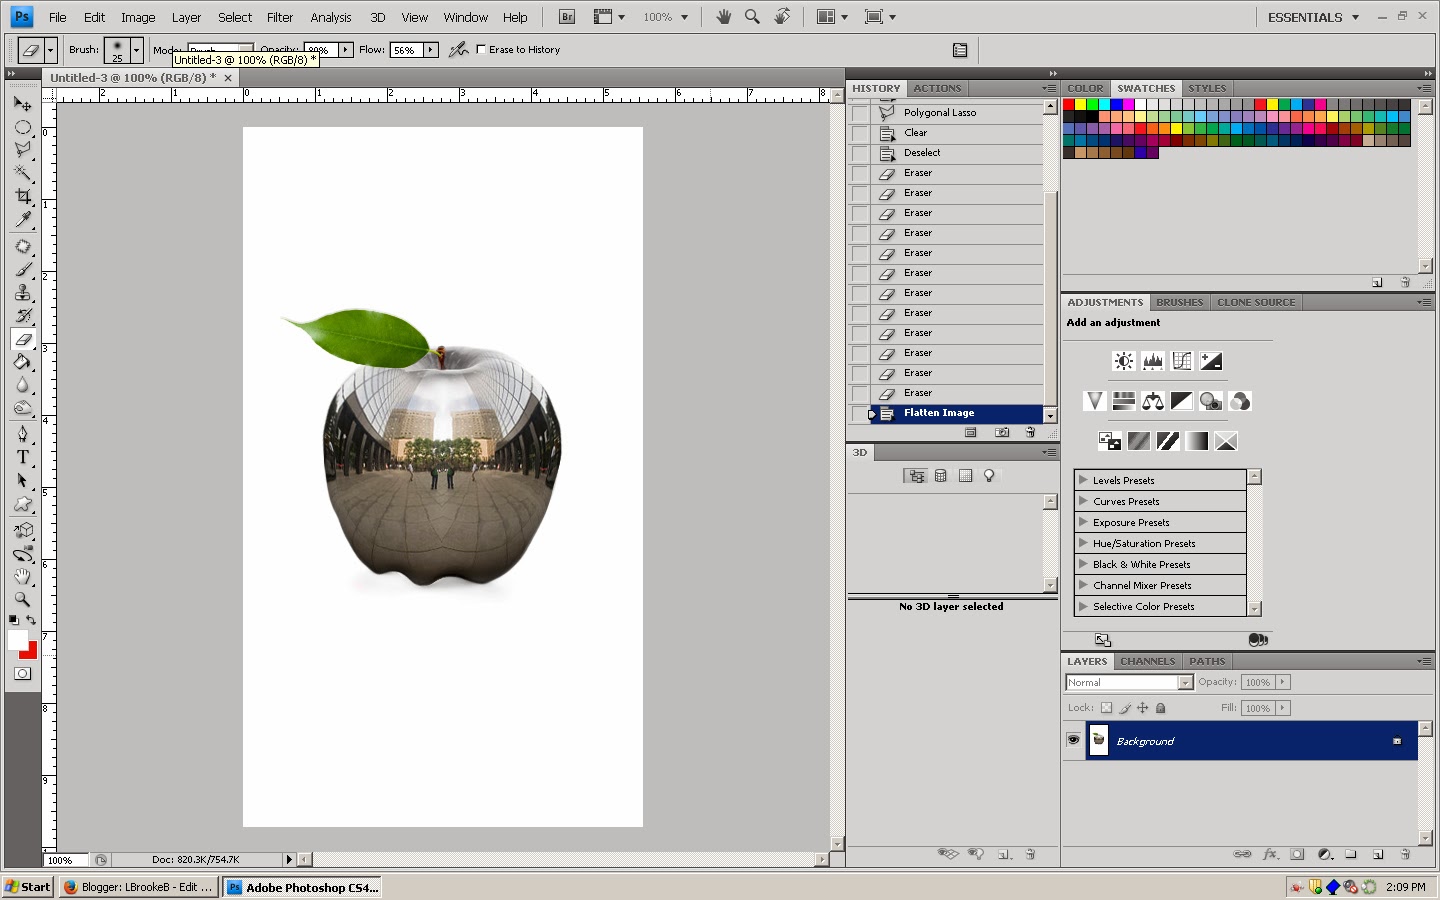


Step 9: now find a picture of a mouth with a tongue, copy it, the ctrl+T paste it onto the apple (make sure the mouth has a long enough tongue that you can to your next steps).

Now go online again and find a picture with of the technology company Apple logo, and copy and paste it to your picture. You need to move that layer however, underneath the tongue, and turn the tongue layers opacity down to about 45.


Step 10: now ctrl+T to position the apple, but you want to left click, and scroll down to flip vertical, so you will be apple to make the apple fit well


now repeat step 5 using the filter-liquify to mold the tongue around the apple logo (this is on the tongue layer)


Step 11: no we are on to the easy parts- pick a background for your apple copy it, the do ctrl+N to make a new page, about 700x700, paste, and do ctrl+T to make the bench really large so that when you put the apple on it, it will seen as if its sitting on it.(first you must do layer, flatten image to drag whole thing) Next do windows-arrange-float all in windows and then click onto your apple layer, then drag it onto the bench project.


now you will want to consolidate them to tabs again so you can work on your bench

Step 12: cut out the white from the apple layer with the polygonal lasso tool so that it will look like this

13: finally, you can simply find a picture of an apple with a bite taken out of it, copy and paste it ctrl+V and move it around and size it ctrl+T until you have it how you would like it. Good Job!

-Brooke Bramante

Thursday, January 2, 2014

Digital Display

                                                                Digital Display Horses

Thursday, December 19, 2013

A Christmas Starry Night

On the Twelfth Day of Photoshop My Students Made For Me..

Holiday Art History Mash Up.

Wednesday, December 18, 2013

Miley in Stone

 On the 11th Day of Photoshop my Students..
Turned a pop Icon into a sculpture!

Tuesday, December 17, 2013

Bad Mail

On the tenth day of photoshop my students sent to me .... some ba ah ah ahhhhahhhhd mail!

Bean Anima

On the Ninth Day of Photoshop my Students Made for Me..  
An Animation Drawn by a First Grader!

Thursday, December 12, 2013

New Mascot For our Sponsored Highschool


(I couldn't decide which one i liked best so i just posted all three)
On the 8th Day of Photoshop designing something cool, create a new mascot for our sponsored high school!

Wednesday, December 11, 2013

scribble art

 On the Seventh Day of Photoshop my Students Made for Me..   Some Scribble Art that Almost Looks 3D!

Tuesday, December 10, 2013

Funny Movie poster Parody

gOn the Sixth Day of Photoshop my Students Made for Me..

A funny movie poster parody

Monday, December 9, 2013

Literal Interpretations

 TurtleDove
CakePop
                                                                        SpearMint
                                                                       BullFrog

3D Horse picture

On the Third day of Photoshop the project gave to me, something that just turned into 3D!

Thursday, December 5, 2013

Candycane Reindeer

On the Fourth Day of Photoshop I almost went insane, and turned a Critter into a Candy Cane. 

Tuesday, December 3, 2013

Cat disguised as a Tiger


On the Second day of Photoshop the teacher gave to me, show a Reflection’s True Identity!


Monday, December 2, 2013

New Pepsi Potato Chips


On the first day of Photoshop the teacher gave to me, swap a products brand identity!

Thursday, November 7, 2013

Ian Sands Cup Portrait


                     We chose to do our project on Mr.Sands because he wanted us to do a self portrait project, and it seemed only fair that he got the chance to have his face enlarged and up for everyone to see since it was HIS idea.When we were brainstorming for this project we wanted to make it big enough for other people to see so, why not do the cup project? This material was perfect as we had a very large fence for us to put the cups on, and other people would see it because it was the soccer fields fence. Risks however, in doing this project were that its hard to make the cups all fit in the fence so tightly together, so we had to go through and break alot of the cups before we even put them into the fence.Also, some of the cups fall out or blew out of the fence, and we were only out there for about three hours a day, and kids ar constantly around that area so if they wanted too, they could have taken our project down and we would have to start over. Also, the hair was really high up in the fence so Bailey ahd to climb up really high and put them in one by one, until we got low enough on the fence so that we could stand on the ground. Another hardship was the fact that the soccer field was always locked when we were out there, so we naturally had to clim b the fence and we were vary considerate and climbed the old, rickety, ALREADY BROKEN entrance to be able to spray paint our cups on the other side. Even though we were so kind as to make sure we weren' haring the fence in any way, we were still yelled at for doing nothing wrong...Anyway the cups that we chose did have a connection with Mr.Sands because in Art 1 of last year we did the very same project, and Mr.Sands was super excited about it and we had to pick teams and everything, except everyone in the class refused to do work and none of the cups added up to look to a portrait at all, so we decided to recreate that and see if we could accept the challenge and make a face out of cups.


Wednesday, October 30, 2013

Sticky Situation


                                                                    Feel Good Friday!!

                                                         -   Sticky Situation  -

         
                  For this project, our theme, or main idea was "Sticky Situation". This could be any thing we thought was a sticky situation, such as things like tape or spider webs to things like a real life situation that you're facing. My first ideas for Sticky Situation consisted mostly of honey, tape, gum, spider webs, things like that. However, I didn't want to paint or watercolor things like that, so I went online and was just looking of sticky animals and the first thing that came to mind was a tree frog because you always see pictures of them sticking to glass or trees and leaves. Then I had to figure out what i should do for the background because the frog obviously can't just be floating in the air. I thought about doing a forest in the background, but that would be way to much green if the frogs are greenh too, and it might look to busy since the main thing is supposed to be the frog. Then I thought well what if I did a wallpaper in the background and the frog could look as if it was eaither part of the wallpaper, or actually sitting ontop of the wallpaper (I still don't know). 
         Repition was also supposed to be a part of this project, so I just decided to do three frogs because it might help to balance out the picture better anyway. Then we had the choice of watercolor or acrylic. I'm not really comfortable with either because I have only used acrylic one other time before this, and I have never done a water color project (although I've attempted and it didn't turn out well,), but i decided to do acrylic, thinking a darker ,richer, frog might look nicer and more realistic with the whole wallpaper thing going on. A challenge with using the acrylic was colors. When you make a nice shade that your pretty happy with and you start using it, it runs out pretty quick. Then you have to sit there for 10 more minutes just trying to get the shade that matches the color that you previously used, like when I had to use the tape to make lines where I wanted the darker blue for my wallpaper background. When I went to peel the tape off, part of the paint came of with it so i had to go back over it, after of course, i made the color again. Another challenge that I faced was making the small outline details. With the brushes its harder to make the small then outlines that you want (even if you have the smallest brush ever made) and to make them stand out is even harder. 
           At the beginning of this project, we did mini lessons on all the different ways you can paint or use paint, and the ways you should be mixing colors if you want it to turn out the way that you initially intended. I think that these lessons were very benificial to me because I was very inexperienced when it comes to working with acrylic, and the water colors were deffinently out of my comfort zone, so these helped me to get used to using these supplies more. We also talked out how when your trying to make colors, you always mix the darker color onto the light, not the other way around. 1) because it takes less paint to get the shade that you want, and 2) because it helps to keep your pallet clearer so you have more room and don't mix colors that you were'nt trying to mix which was something that I really needed to know. All in all, this was a very fun project and I would deffinently do it again .

-Brooke Bramante